")
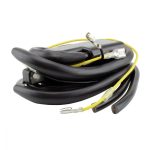

RMS060-105990 | Ignition Coil for Johnson / Evinrude 2 3 4 5 6 9 10 15 18 20 25 28 30 33 35 hp Mercury 3 7.5 10 40 hp 1949-1990 | 584477 |
C$48.59
Dimensions:
Width: 45 mm
Length: 90 mm
Height: 38 mm
Wires length: Green: 80 mm Black: 60 mm
Fixation holes center to center: 68 mm
Resistance: Black to Green 0.8 ohms
Brand new aftermarket Ignition Coil
- Direct replacement to your original unit
- Plug-and-play, direct fit, easy installation
- All products shipped are tested
*All item pictures are accurate; if in doubt, do not hesitate to compare our item to your original part.
Remove the yellow wire from the external ignition coil, if it is not applicable to your model.
After installing the coil, the armature plate should be rotated over its full range of travel to insure that it turns freely when the motor is running. If there is any interference, the coil mounting screws should be checked to see if they are contacting the top of the cylinder and the crankcase. If they are, remove the mounting screws and grind or file the end of each screw to eliminate interference. After shortening the screws, each tip should be ground to a slight point to facilitate reassembly of the coil. To keep the existing threads free of metal particles during grinding or filing, attach a 10-24 nut to the screw prior to grinding. After the modification is completed, remove the nut from the screw and reassemble the coil.
| Weight | 0.23 kg |
|---|---|
| Dimensions | 228.6 × 114.3 × 96.52 cm |
| Brand |
RMSTATOR |
| Fitment Type |
Guaranteed Fit |
OEM AND OTHER PART NUMBER
OEM NUMBER
- 0584-477, 0584.477, 0584 477, 0584477
- 0582-995. 0582.995, 0582 995, 0582995
- 0582-931, 0582.931, 0582 931, 0582931
- 0582-370, 0582.370, 0582 370, 0582370
- 802-371, 802.371, 802 371, 802371
- 8023-71A1, 8023.71A1, 8023 71A1, 802371A1
ADDITIONAL NUMBER
- RMS060-105990
DO NOT MANUFACTURE PARTS, DESIGN PERMANENT SOLUTIONS
We cultivate our actions towards finding permanent solutions. There is no way, us, as customers, would like to replace a part again and again. This mindset forces our team to design to fix, to conquer these pesky electrical failures in powersport.
GOOD DESIGN PRODUCE GOOD PRODUCTS. EFFICIENT DESIGN CREATES STELLAR PRODUCTS.
We are committing to innovate in finding clever ways to design more efficient parts that produce better results than any other part on the market.
WE ALL ARE CUSTOMERS ELSEWHERE.
In our shopping journey for buying our daily goods, we all expect to be treated with respect in a relation that makes us feel welcomed. Our team is encouraged to elevate that standard even higher and to provide all the information necessary for an easy and reliable installation.
OWN YOUR CUSTOMER PAIN LIKE IT IS YOURS
We own powersport rides ourselves. We feel the pain of dealing with unsolvable troubleshooting on our rides. We are committed in manufacturing complete solutions to known or I-would-never-have-suspected issues that are plaguing your rides... and ours.